

Last updated on April 6th, 2017 at 12:29 pm
In my previous post I give some basic and required information related to AngularJs now in this post I cover some most important topics which help you to build your own application in AngularJs. I am also using NodeJs as backend. In Node, I built my REST API through which we can perform CRUD operation on the database. Now before we start creating our Angular Application I think you have good knowledge of NodeJs and Express because first we can create a REST Api for our Application.
REST API in NodeJs using Express
Step 1. Install ExpressJs from the official website or open terminal and go to that location where you want to install or create your application and after that run below command on terminal.
cd /var/www/html/node/
npm install express --save
If you want to install all require module together you can create package.json file in your folder and add below code on it and run npm install command on the terminal and it will install all required module for your project
{
  "dependencies": {
    "express": "4.13.3",
    "body-parser": "1.14.1",
    "mysql": "^2.10.2"
  }
}
Once it will install all required module for your application you can move to next step.
Step 2. Now create server.js file and add below code in it
var express = require('express')
var app = express()
var bodyParser = require('body-parser')
var mysql = require("mysql")
// DataBase
var con = mysql.createConnection({
	host: "localhost",
	user: "root",
	password: "demo@123",
	database: "trinityApp"
});

con.connect(function(err){
	if(err){
		console.log('Error connecting to Db');
		return;
	}
	console.log('Connection established');
	// Clear history
	//clearPeerOnRestart();
});

// Add headers
app.use(function (req, res, next) {

    // Website you wish to allow to connect
    res.setHeader('Access-Control-Allow-Origin', 'http://localhost:3001');

    // Request methods you wish to allow
    res.setHeader('Access-Control-Allow-Methods', 'GET, POST, OPTIONS, PUT, PATCH, DELETE');

    // Request headers you wish to allow
    res.setHeader('Access-Control-Allow-Headers', 'X-Requested-With,content-type');

    // Set to true if you need the website to include cookies in the requests sent
    // to the API (e.g. in case you use sessions)
    res.setHeader('Access-Control-Allow-Credentials', true);

    // Pass to next layer of middleware
    next();
});

app.use(bodyParser.urlencoded({
	extended: true
}));

app.use(bodyParser.json());

app.get('/', function (req, res) {
  res.send('Hello World!')
})

app.get('/getList', function(req, res){
  var qur = con.query('SELECT * FROM info',function(err,rows){
				if(err) throw err;

				if(rows.length > 0){

          console.log(rows);

          res.setHeader('Content-Type', 'application/json');
					res.send(rows);
				}
			});
});

app.get('/info/:id', function(req, res){
    con.query('SELECT * FROM info WHERE id = ? ', req.params.id , function(err,rows){
			  if(err)
          throw err;

        res.setHeader('Content-Type', 'application/json');
        res.send(rows);
		});
});

app.put('/edit/:id', function(req, res){
    var data = req.body;
    con.query('UPDATE `info` SET ? WHERE id=?', [data, req.params.id] , function(err,rows){
			  if(err)
          throw err;

        res.setHeader('Content-Type', 'application/json');
        res.send(JSON.stringify({'status': 1, 'msg': 'Information updated succesfully'}));
		});
});

app.post('/save', function(req, res){
    var data = req.body;
    con.query('INSERT INTO info set ? ', data , function(err,rows){
			  if(err)
          throw err;

        res.setHeader('Content-Type', 'application/json');
        res.send(JSON.stringify({'status': 1, 'msg': 'Information added succesfully'}));
		});
});

app.delete('/removeInfo/:id', function(req, res){
  // Delete info by id
  con.query('DELETE FROM `info` WHERE `info`.`id` = ? ', req.params.id , function(err,rows){
			  if(err)
          throw err;

        res.setHeader('Content-Type', 'application/json');
        res.send(JSON.stringify({'status': 1, 'msg': 'Information deleted succesfully'}));
		});
})

app.listen(3000, function () {
  console.log('Example app listening on port 3000!')
})
Above code is very simple to understand if you have basic knowledge of Node and ExpressJs, we create our application and allow specific port in which we can run this and also create some method/routes which handle the requests. I am using MySQL as default Database for this application so you also need to create Database and table where we put our data and perform CURD operation.You need to create Database and run below query to create table inside your database.
--
-- Table structure for table `info`
--

CREATE TABLE `info` (
  `id` int(11) NOT NULL,
  `firstName` varchar(22) NOT NULL,
  `lastName` varchar(22) NOT NULL,
  `gender` varchar(22) NOT NULL
) ENGINE=InnoDB DEFAULT CHARSET=latin1;

--
-- Dumping data for table `info`
--

INSERT INTO `info` (`id`, `firstName`, `lastName`, `gender`) VALUES
(1, 'Aneh', 'Thakur', 'Male'),
(2, 'Amit', 'Kumar', 'Male');

--
-- Indexes for dumped tables
--

--
-- Indexes for table `info`
--
ALTER TABLE `info`
  ADD PRIMARY KEY (`id
Now your Database and REST API is ready and we move to our main Application which is AngularJs application.
Simple AngularJs Application Performing CURD operation
Now create a new separate folder where we can create our application.
Step 1. First, we can install AngularJs CLI which help to setup our application fast and also helpful to create components so type below commands in terminal and lets get started.
npm install -g @angular/cli
ng new trinity-app
cd trinity-app
ng serve --port 3001
I am running my application in 3001 port if you want to run your application in default port which is 4200 you can type
ng serve
Step 2. Now open browser and type http://localhost:3001 or 4200 if you are using default port if everything is fine you get welcome page.
Step 3. Now we create our first/default screen so we need to create a component using CLI to create your component type bellow command and it will generate component for u.
ng generate component home
this code generate component for you after this we create some other component which we use in our application
ng generate component lists
ng generate component edits
ng generate component add
this will generate all component and folder inside app folder. Now open app.module.ts inside app folder add routes in it which define which component we need to load according to request URL
You need to import RouterModule from angular and define your routes. In Angular 2 whatever you need you need to import that module or component etc.
import { RouterModule, Routes } from '@angular/router';

const appRoutes: Routes = [
  { path: '',  component: HomeComponent },
  { path: 'lists',  component: ListsComponent },
  { path: 'add', component: AddComponent },
  { path: 'edit/:id', component: EditComponent }
];
Above I pass Array of routes which explain our application which component we want to load when this type of request is made. Bellow is my complete code of app.module.ts in this I also import some other module which I explain later in this project.
import { BrowserModule } from '@angular/platform-browser';
import { NgModule } from '@angular/core';
import { FormsModule } from '@angular/forms';
import { HttpModule } from '@angular/http';
import { RouterModule, Routes } from '@angular/router';
import { FormBuilder, FormGroup, ReactiveFormsModule } from '@angular/forms';

// Load component which we create
import { AppComponent } from './app.component';
import { ListsComponent } from './lists/lists.component';
import { AddComponent } from './add/add.component';
import { HomeComponent } from './home/home.component';
import { EditComponent } from './edit/edit.component';

const appRoutes: Routes = [
  { path: '',  component: HomeComponent },
  { path: 'lists',  component: ListsComponent },
  { path: 'add', component: AddComponent },
  { path: 'edit/:id', component: EditComponent }
];

@NgModule({
  declarations: [
    AppComponent,
    ListsComponent,
    AddComponent,
    HomeComponent,
    EditComponent
  ],
  imports: [
    BrowserModule,
    FormsModule,
    HttpModule,
    ReactiveFormsModule,
    RouterModule.forRoot(appRoutes, { useHash: false })
  ],
  providers: [],
  bootstrap: [AppComponent]
})
export class AppModule { }
Step 4. For this application, i am using bootstrap so we need to add bootstrap library in our application to add those link open index.html which is inside src folder of your project open that and add Scripts and CSS in it
<!doctype html>
<html>
<head>
  <meta charset="utf-8">
  <title>TrinityApp</title>
  <!-- Latest compiled and minified CSS -->
  <link rel="stylesheet" href="https://maxcdn.bootstrapcdn.com/bootstrap/3.3.7/css/bootstrap.min.css" integrity="sha384-BVYiiSIFeK1dGmJRAkycuHAHRg32OmUcww7on3RYdg4Va+PmSTsz/K68vbdEjh4u" crossorigin="anonymous">
  <!-- Optional theme -->
  <link rel="stylesheet" href="https://maxcdn.bootstrapcdn.com/bootstrap/3.3.7/css/bootstrap-theme.min.css" integrity="sha384-rHyoN1iRsVXV4nD0JutlnGaslCJuC7uwjduW9SVrLvRYooPp2bWYgmgJQIXwl/Sp" crossorigin="anonymous">

  <!-- jQuery (necessary for Bootstrap's JavaScript plugins) -->
  <script src="https://ajax.googleapis.com/ajax/libs/jquery/1.12.4/jquery.min.js"></script>
  <!-- Latest compiled and minified JavaScript -->
  <script src="https://maxcdn.bootstrapcdn.com/bootstrap/3.3.7/js/bootstrap.min.js" integrity="sha384-Tc5IQib027qvyjSMfHjOMaLkfuWVxZxUPnCJA7l2mCWNIpG9mGCD8wGNIcPD7Txa" crossorigin="anonymous"></script>

  <base href="/">

  <meta name="viewport" content="width=device-width, initial-scale=1">
  <link rel="icon" type="image/x-icon" href="favicon.ico">
</head>
<body>
  <app-root>Loading...</app-root>
</body>
</html>
Step 5. Now we can create menus for our application through which we can navigate in our application. To create menus for your application open app.component.html file which is inside app folder open this file and create a menu for your application as shown bellow.
<div class="container">
    <nav class="navbar navbar-default">
        <div class="container-fluid">
            <!-- Brand and toggle get grouped for better mobile display -->
            <div class="navbar-header">
                <button type="button" class="navbar-toggle collapsed" data-toggle="collapse" data-target="#bs-example-navbar-collapse-1"
                    aria-expanded="false">
                    <span class="sr-only">Toggle navigation</span>
                    <span class="icon-bar"></span>
                    <span class="icon-bar"></span>
                    <span class="icon-bar"></span>
                </button>
                <a class="navbar-brand" routerLink="/" routerLinkActive="active"><img src="/favicon.ico"></a>
            </div>
            <!-- Collect the nav links, forms, and other content for toggling -->
            <div class="collapse navbar-collapse" id="bs-example-navbar-collapse-1">
                <ul class="nav navbar-nav navbar-right">
                    <li><a routerLink="/lists" routerLinkActive="active">Lists</a></li>
                    <li><a routerLink="/add" routerLinkActive="active">Add User</a></li>
                </ul>
            </div>
        </div>
        <!-- /.navbar-collapse -->
    </nav>
</div>
<router-outlet></router-outlet>
The RouterOutlet directive is used to display views for a given route. This is where templates of specific routes are loaded while we navigate. If you want to pass some dynamic data in your HTML file or need to create dynamic menus you can pass from your main app component to do this open app.component.ts file and create array title for your page
import { Component } from '@angular/core';

@Component({
  selector: 'app-root',
  templateUrl: './app.component.html',
  styleUrls: ['./app.component.css']
})
export class AppComponent {
  title = 'Trinity Tuts :)';
}
Now if you want to call this variable in your HTML file call like this as shown bellow
<h2>{{title}}</h2>and this will print value it contains. Our menu is ready and now we can create our home page which load’s when we land on this site. Now open home.component.html in this page I paste simple static content
<div class="container">
    <div class="jumbotron">
    <h1>Trinity Tuts :)</h1>
    <p class="lead">Welceom to trinty tuts first demo application on Angular Js 2. In this sample project I can explain you how to create a simple Angualr Js application using NodeJs backend. </p>
    <p>Hope this sample application help you to learn some basics of Angular Js 2.</p>
    <p><a class="btn btn-lg btn-success" routerLink="/add" role="button">Add Info</a></p>
    </div>
</div>
After creating this page switch to the browser and check your application it looks like this.

Step 6. Now edit add.component.ts which is inside add folder. In this file, we can communicate with our API and save form data to Database. In this, i also import some other module like Http Module which helps to send and get a response from server and Routes through which we can redirect our application after we get the success message from the server. In this, I also import FormBuilder which help us to inflate value in form.
import { Component, OnInit } from '@angular/core';
import { FormBuilder, FormGroup, ReactiveFormsModule } from '@angular/forms';
import { Http, Response, Request, RequestMethod, Headers, RequestOptions } from '@angular/http';
import { ActivatedRoute, Params, Router } from '@angular/router';


@Component({
  selector: 'app-add',
  templateUrl: './add.component.html',
  styleUrls: ['./add.component.css']
})
export class AddComponent implements OnInit {
  myForm: FormGroup;
  constructor(public fb: FormBuilder, public http: Http, private activatedRoute: ActivatedRoute, public router: Router) {
    this.myForm = fb.group({
        'firstName' : '',
        'lastName': '',
        'gender' : '',
    });
  }

  ngOnInit() {

  }

  submitForm(myForm: any): void{
    console.log('Form Data Request: ');
    console.log(myForm);
    let headers = new Headers();
    headers.append('Content-Type', 'application/json');
    let options = new RequestOptions({ headers: headers });
    this.http.post('http://localhost:3000/save', myForm, headers).subscribe(
          (res: Response) => {
            console.log('Response: ');
            console.log(res.json());
            this.router.navigate(['./lists']);
          }
      );
  }
}
In above class I also create a submitForm() method which helps to post data to server and when data is saved we redirect to lists page where we show list of save information. Now open add.component.html and paste below code in it
<div class="container">
  <div class="row">
    <div class="col-md-3"></div>
    <div class="col-md-6">
        <form [formGroup]="myForm" (ngSubmit)="submitForm(myForm.value)">
          <div class="form-group">
            <label>First Name:</label>
            <input type="text" class="form-control" placeholder="" name="firstName"  [formControl]="myForm.controls['firstName']">
          </div>
          <div class="form-group">
            <label>Last Name</label>
            <input type="text" class="form-control" placeholder="" name="lastName"  [formControl]="myForm.controls['lastName']">
          </div>
          <div class="form-group">
            <label>Gender</label>
          </div>
          <div class="radio">
            <label>
              <input type="radio" name="gender" value="Male" [formControl]="myForm.controls['gender']">
              Male
            </label>
          </div>
          <div class="radio">
            <label>
              <input type="radio" name="gender" value="Female" [formControl]="myForm.controls['gender']">
              Female
            </label>
          </div>
          <div class="form-group">
            <button type="submit" class="btn btn-default">Submit</button>
          </div>
        </form>
    </div>
    <div class="col-md-3"></div>
  </div>
</div>
Please note how we call FormGroup and NgSubmit in form
<form [formGroup]="myForm" (ngSubmit)="submitForm(myForm.value)">
          <div class="form-group">
            <label>First Name:</label>
            <input type="text" class="form-control" placeholder="" name="firstName"  [formControl]="myForm.controls['firstName']">
          </div>
After saving form data in Database we need to load that data and show in our views.

Step 7. Now we load data from API this part is little confusing for the first time but once you understand then this is very easy. Fisrt create new file inside lists folder and name it as lists.ts in this class we define which type of data we load and name of object we get from service.
export class Lists{
    id: number;
    firstName: string;
    lastName: string;
    gender: string;
}
After this we can create service class lists.service.ts which load data from API and save it into Array list.
import { Injectable }    from '@angular/core';
import { Http, Response, Request, RequestMethod, Headers, RequestOptions } from '@angular/http';
import { Lists } from './lists';
import 'rxjs/add/operator/map';

@Injectable()
export class ListsService{
    // Class constructor with Jsonp injected
    constructor(public http: Http) { }

    loadLists(){
        return this.http.get('http://localhost:3000/getList')
                         .map(response => <Lists[]>response.json());
                         //.subscribe(data => console.log(data), error => console.log(error));
    }
}
I import Injectable module because we are going to use this class in our main class so we make this class @Injectable() in this we use map and pass json response to Array list. Here i also import List class which i create and when i get response from API I will save that data as Array using that class.
Now open main class lists.component.ts in this file we import our service class and call method which we create to load data from API and pass that data to view
import { Component, OnInit } from '@angular/core';
import { ListsService } from './lists.service';
import { Lists } from './lists';
import { Http, Response, Request, RequestMethod, Headers, RequestOptions } from '@angular/http';
import {Observable} from 'rxjs/Rx';
import 'rxjs/add/operator/map';

@Component({
  selector: 'app-lists',
  templateUrl: './lists.component.html',
  styleUrls: ['./lists.component.css'],
  providers: [ListsService]
})
export class ListsComponent implements OnInit {

  lists: Observable<Lists[]>;

  constructor(public http: Http, private dataLists: ListsService) { }

  ngOnInit() {
    this.lists = this.dataLists.loadLists();
  }

  deleteInfo(id){
      if (confirm('Are you sure you want to delete info ' + id)) {
        let headers = new Headers();
        headers.append('Content-Type', 'application/json');
        let options = new RequestOptions({ headers: headers, method: RequestMethod.Delete });
        return this.http.delete('http://localhost:3000/removeInfo/'+id).subscribe(
            (res: Response) => {
              console.log('Response: ');
              console.log(res.json());
              this.lists = this.dataLists.loadLists();
            }
        );
      }
  }
}
I call my service inside ngOnInit and pass that data to Observable Array. I also create a method to delete data from list and after deleting data i reload data from API. Now open lists.component.html and paste below code init.
<div class="container">
<div class="row">
<div class="col-md-3"></div>
<div class="col-md-6">
<table class="table table-striped">
<thead>
<tr>
<th>#</th>
<th>First Name</th>
<th>Last Name</th>
<th>Gender</th>
<th>Action</th>
</tr>
</thead>
<tbody>
<tr *ngFor="let data of lists | async">
<th scope="row">{{data.id}}</th>
<td>{{data.firstName}}</td>
<td>{{data.lastName}}</td>
<td>{{data.gender}}</td>
<td>
<a (click)="deleteInfo(data.id)"><i class="glyphicon glyphicon-trash"></i></a>
<a [routerLink]="['/edit', data.id]"><i class="glyphicon glyphicon-pencil"></i></a>
</td>
</tr>
</tbody>
</table>
</div>
<div class="col-md-3"></div>
</div>
</div>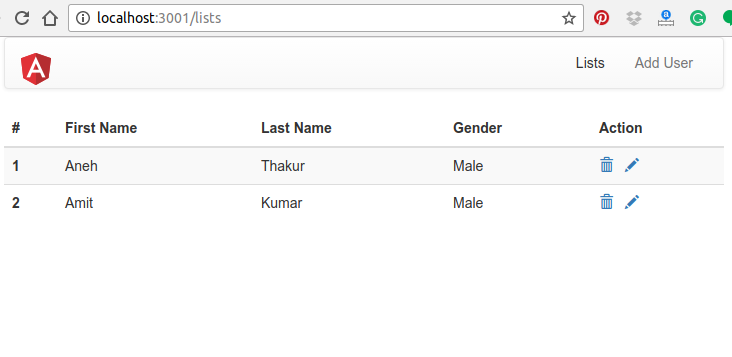
Step 8. Now when we click on edit link we need to load data from API and inflate that data into a form, now edit edit.component.ts file in this file first we get ID from routes using activatedRoute .
import { Component, OnInit } from '@angular/core';
import { FormBuilder, FormGroup, ReactiveFormsModule } from '@angular/forms';
import { Http, Response, Request, RequestMethod, Headers, RequestOptions } from '@angular/http';
import { ActivatedRoute, Params, Router } from '@angular/router';

@Component({
  selector: 'app-edit',
  templateUrl: './edit.component.html',
  styleUrls: ['./edit.component.css']
})
export class EditComponent implements OnInit {
  myForm: FormGroup;
  infoId: number;

  constructor(public fb: FormBuilder, public http: Http, private activatedRoute: ActivatedRoute, public router: Router) {
    this.isEdit(fb);
  }

  ngOnInit() {
     this.activatedRoute.params.subscribe((params: Params) => {
       this.infoId = +params['id']; // (+) converts string 'id' to a number
       // In a real app: dispatch action to load the details here.
    });
  }

  submitForm(myForm: any): void{
    console.log('Form Data Request: ');
    console.log(myForm);
    console.log(this.infoId);
    let headers = new Headers();
    headers.append('Content-Type', 'application/json');
    let options = new RequestOptions({ headers: headers });
    this.http.put('http://localhost:3000/edit/'+this.infoId, myForm, headers).subscribe(
          (res: Response) => {
            console.log('Response: ');
            console.log(res.json());
            this.router.navigate(['./lists']);
          }
      );
  }

  isEdit(fb){
      //console.log(params['id']);
      this.activatedRoute.params.subscribe((params: Params) => {
        let id = params['id'];
        if(id){
            this.loadInfoById(id, fb);
          }
          this.myForm = fb.group({
             'firstName' : '',
             'lastName': '',
             'gender' : '',
          });
      });
  }

  loadInfoById(id, fb){
    let headers = new Headers();
        headers.append('Content-Type', 'application/json');
        let options = new RequestOptions({ headers: headers, method: RequestMethod.Delete });
        return this.http.get('http://localhost:3000/info/'+id).subscribe(
            (res: Response) => {
              var data = res.json()[0];
              // Set value in form
              this.myForm.get('firstName').setValue(data.firstName);
              this.myForm.get('lastName').setValue(data.lastName);
              this.myForm.get('gender').setValue(data.gender);
            }
        );
  }
}
Now add below Html code in your edit.component.html file inside edit folder
<div class="container">
  <div class="row">
    <div class="col-md-3"></div>
    <div class="col-md-6">
        <form [formGroup]="myForm" (ngSubmit)="submitForm(myForm.value)">
          <div class="form-group">
            <label>First Name:</label>
            <input type="text" class="form-control" placeholder="" name="firstName"  [formControl]="myForm.controls['firstName']">
          </div>
          <div class="form-group">
            <label>Last Name</label>
            <input type="text" class="form-control" placeholder="" name="lastName"  [formControl]="myForm.controls['lastName']">
          </div>
          <div class="form-group">
            <label>Gender</label>
          </div>
          <div class="radio">
            <label>
              <input type="radio" name="gender" value="Male" [formControl]="myForm.controls['gender']">
              Male
            </label>
          </div>
          <div class="radio">
            <label>
              <input type="radio" name="gender" value="Female" [formControl]="myForm.controls['gender']">
              Female
            </label>
          </div>
          <div class="form-group">
            <button type="submit" class="btn btn-default">Submit</button>
          </div>
        </form>
    </div>
    <div class="col-md-3"></div>
  </div>
</div>
After this, you can check this in your browser.

Hope this will help you to understand basic of Angular Js 2 🙂